Created: 3 months ago
Mastering Audio in Fairlight - DaVinci Resolve 19 Guide
Core Steps for Flawless Audio
Audio tracks may differ depending on where and how you recorded them, but here are some of the common steps to fix that audio, no matter how badly it was recorded.
Normalize Audio Levels
You can start off by setting the audio levels while still in the DaVinci Editing tab - it will be useful if you don’t have a microphone and some parts of your audio sound louder, while some sound quieter.
To do this, select your clip, right-click on it and select the Normalize Audio Levels tool. Here, the normalization mode should be set to Sample Peak Program, and the target level to around -9 dBFS, the standard sound loudness.
Separate the tracks
In Fairlight page, you can additionally separate the tracks. It will become useful if you have more than one person speaking, and you’re moving between locations with different sound isolation. This will help you to edit the tracks separately.
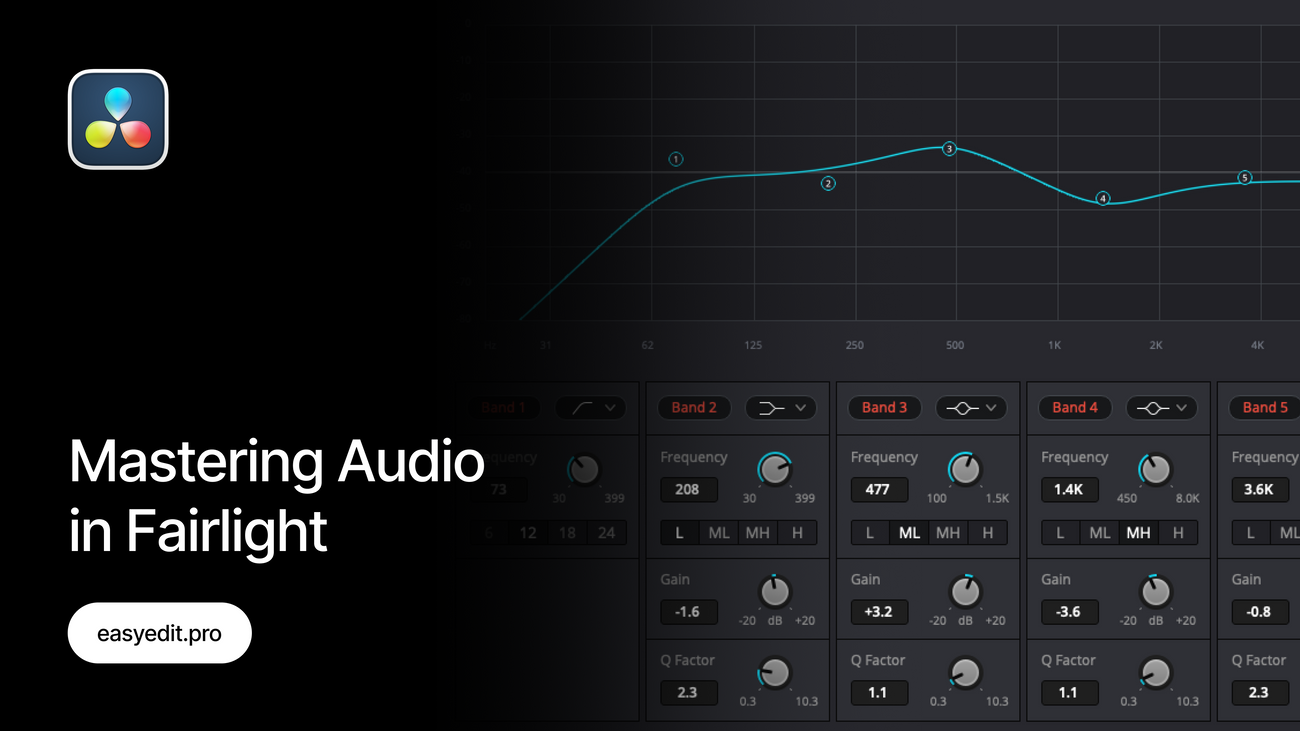
EQ & Voice Isolation
Open the Equalizer to enhance vocal presence and achieve the clarity of your voice, by gently boosting mid-high frequencies and cutting unwanted tones. Make sure to cut the low frequencies and set them somewhere from 100 to 120. Best to listen through your clip to decide what works best for you.
Also, if your track becomes quieter, you can simply boost the Gain on the right side of the panel.
For best results, use the Voice Isolation tool (Studio Version) to automatically reduce background noise. Setting the value between 10 and 15 should deliver clean and natural-sounding results.
Dynamic Control
Open the Dynamics tab - here you can simply select the Dialog - Compression preset to get a great result, or do a bit of manual setting.
Add a Compressor to regulate volume peaks and ensure a consistent vocal level. You can play around with the Threshold(best to be set around-24) and Ratio levels, for the best result.
And to remove additional background noise during the pauses in your speech, use the Expander tool on the left of the Compressor - it will help you to control the background noise. Set the Threshold to -30 to cut out all of the noise below this frequency.
For more control, try Multiband Compression by setting the preset to Impact and Balance and experimenting with the Gain values of your mid frequencies, though basic compression often does the job.
Cleaning & Refinement
Finally, take advantage of the free effects inside on the Fairlight - run your audio through Denoise/De-esser to soften the harsh sounds.
Open the De-esser and pick the preset that matches your voice best. Narrow the frequency range and reduce the De-esser amount to keep your voice natural.
Final Advice
Even with good recording equipment, you’d see a great difference after applying Compression, EQ settings, De-esser and Voice Isolation to your track. Tools within Fairlight can dramatically polish your audio, which can be easier to do in the Studio version of DaVinci Resolve.
For Editors & Audio Enthusiasts:
- Separate tracks with different speakers.
- Prioritize voice clarity.
- Keep background noise under control.
- Use compression and normalized audio levels for professional-level consistency.
Check This
If you've enjoyed this tutorial, don't forget to check more guides - here you can check our recent DaVinci Resolve guides.
Unlock unlimited creative assets with EasyEdit Stock - get access to premium LUTs, transitions, titles, and effects for DaVinci Resolve, updated daily!
The template featured this week is Audio Visual Elements: