Created: 3 months ago
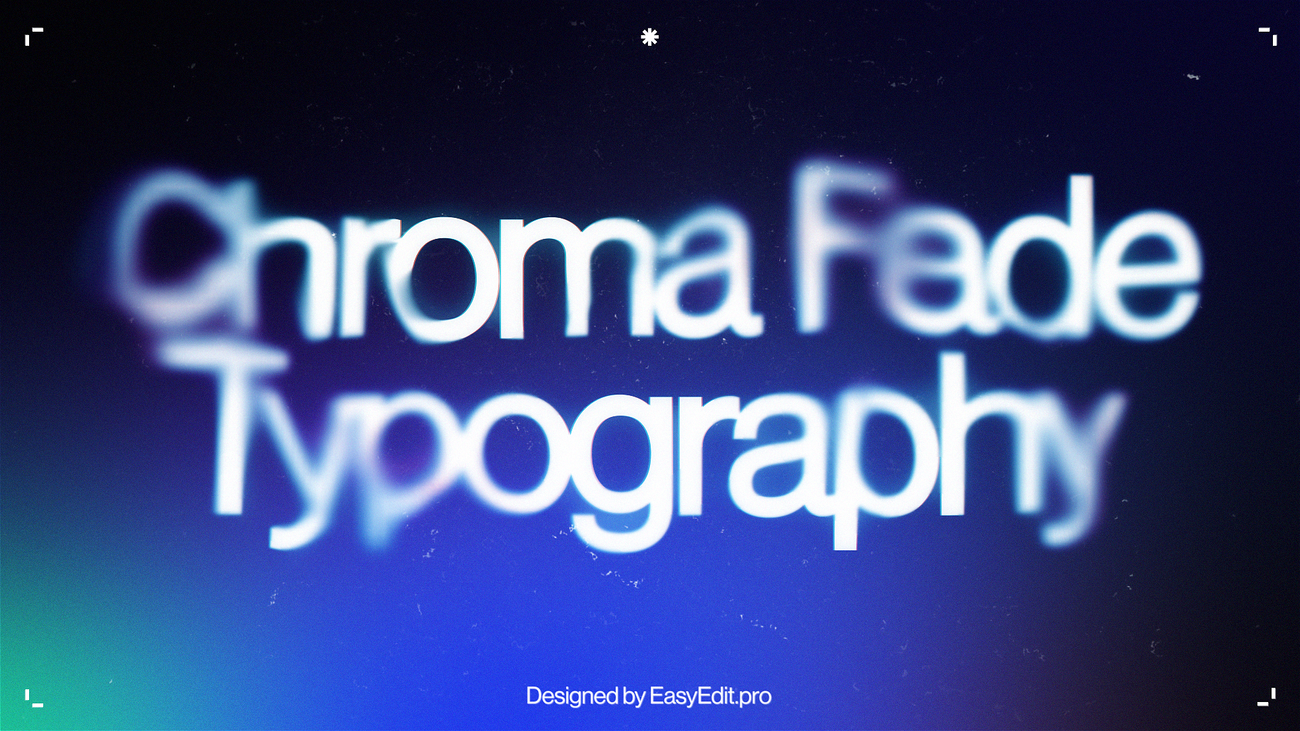
Chroma Fade Typography in After Effects | Step-by-Step Tutorial
Hey editors!
Here’s the result you’ll achieve:
Watch the full Chroma Fade Typography tutorial on YouTube.
You can also download this Chroma Fade Typography Template from EasyEdit Stock.
Chroma Fade Tutorial in After Effects
Create a new text comp and add your text layer. Style and center it.
Click on the All Transform Properties.
Animate the Range Selector from 0th to 75th frame. Easy ease the keyframes and set the speed graphs.
Go to the 0th frame and set the Opacity to 0. Set the animation to be Based on Characters.
Duplicate the Animator and drop the new one on top. Move the keyframes 5 frames forward.
Add a Blur property and set it to 50. Increase the Scale to 135.
Add a Scale keyframe with 110 value.
Add a new Adjustment Layer. Apply CC Lens effect to it and animate Size and Convergence like in the example.
Drop the text comp into a new comp and call it Main.
Add a new black Solid and call it Noise. Add a Fractal Noise to it with these values.
In the Transform, rotate the effect and increase its Scale. Animate the Offset Turbulence and enter these expressions. Add an expression to the Evolution parameter.
With the Fractal Noise effect selected, click on the Copy with Property Links.
Now, we can create a new solid and paste all properties into it. We’ll call this Solid a Noise Distortion, set its color to black. Precompose this Solid.
Hide all layers except for the Text. Add a Displacement Map effect to it and set the values as we do.
Cut out the effect and paste it into the Solid. Add Exposure and Tint effects with these values.
Duplicate the Solid and call it Noise Blur. Delete the Tint effect and make changes to Exposure.
With the text layer selected, add a Vector Blur effect with these values. Add a Compound Blur effect.
Customize the Fractal Noise’s brightness if needed.
Duplicate Noise Distortion and rename it into Noise Color. Pick colors for the Tint.
Change its blending mode. Check the Preserve Transparency for this layer.
Add the Colorama effect with 2,50 cycle repetitions.
Duplicate the text layer and rename it into the Text Blur. Change its Displacement Map and Compound Blur settings a bit. Decrease this layer’s opacity.
Add a Simple Choker and Fill effects. Set the color to white.
Add Roughen Edges and an Evolution expression.
Add an Image Wipe and Turbulent Displace effects with these values.
Add a new Adjustment Layer and apply a Camera Lens Blur effect to it.
Set Curves as we do.
Finally, apply 3D Glasses and Brightness&Contrast effects.
And your Chroma Fade effect is ready!
To Sum Up
Now you can easily create the same Chroma Fade Typography text effect and experiment to make it different!
If you've enjoyed this tutorial, don't forget to check out more guides - here you can check our recent After Effects guides.
You can also watch the full tutorial on YouTube.